So, you bought a new Mac? Or Just installed a new version of Mac? Or Just finished setting up your Hackintosh like me? Here I listed the steps to set up your Mac, I document these steps so that I can use them as a guide for myself when I format my Mac to try different Mac versions, so adjust it to match your requirements.
0. Tweaking Mac by Turning OFF or turning ON a few features.
1. Keyboard Tweaks.
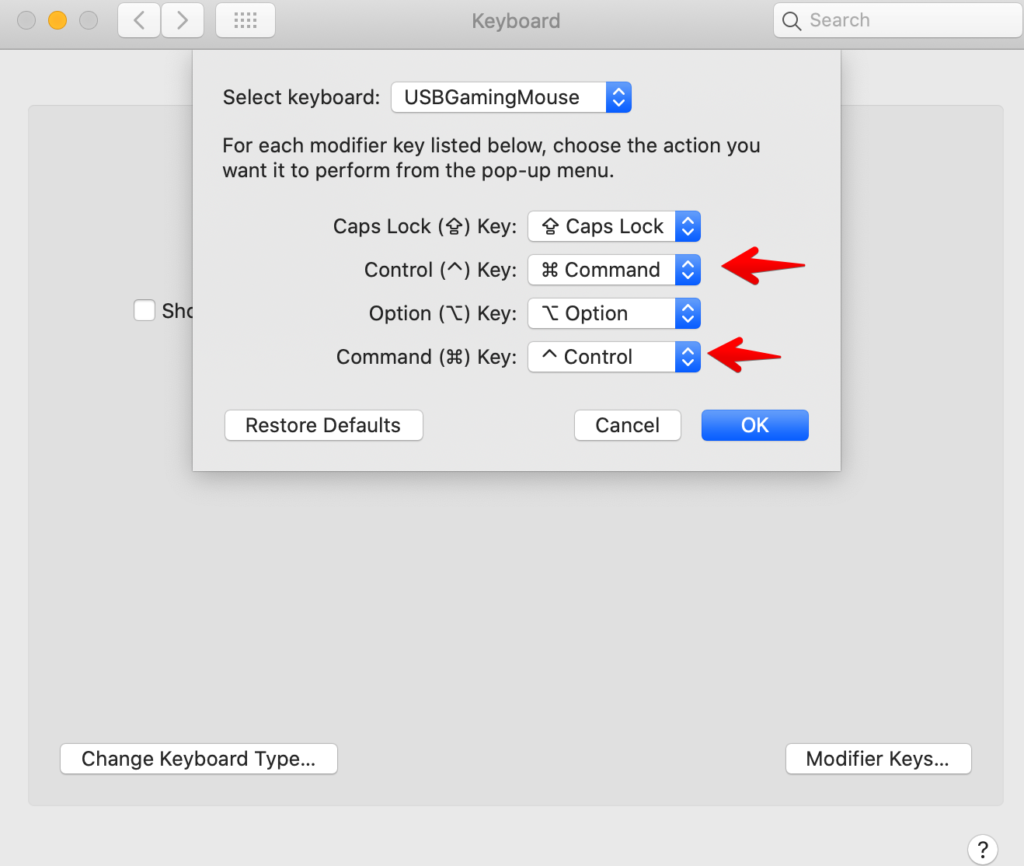
a. Go to ->System Preferences->Keyboard->Keyboard->Modifier Keys… I mapped the control key as the command key and the command key as the control key. As I have got used to as a Windows user for a long time. (For macOS Ventura ->System Preferences->Keyboard->Keyboard Shortcuts->Modifier Keys)
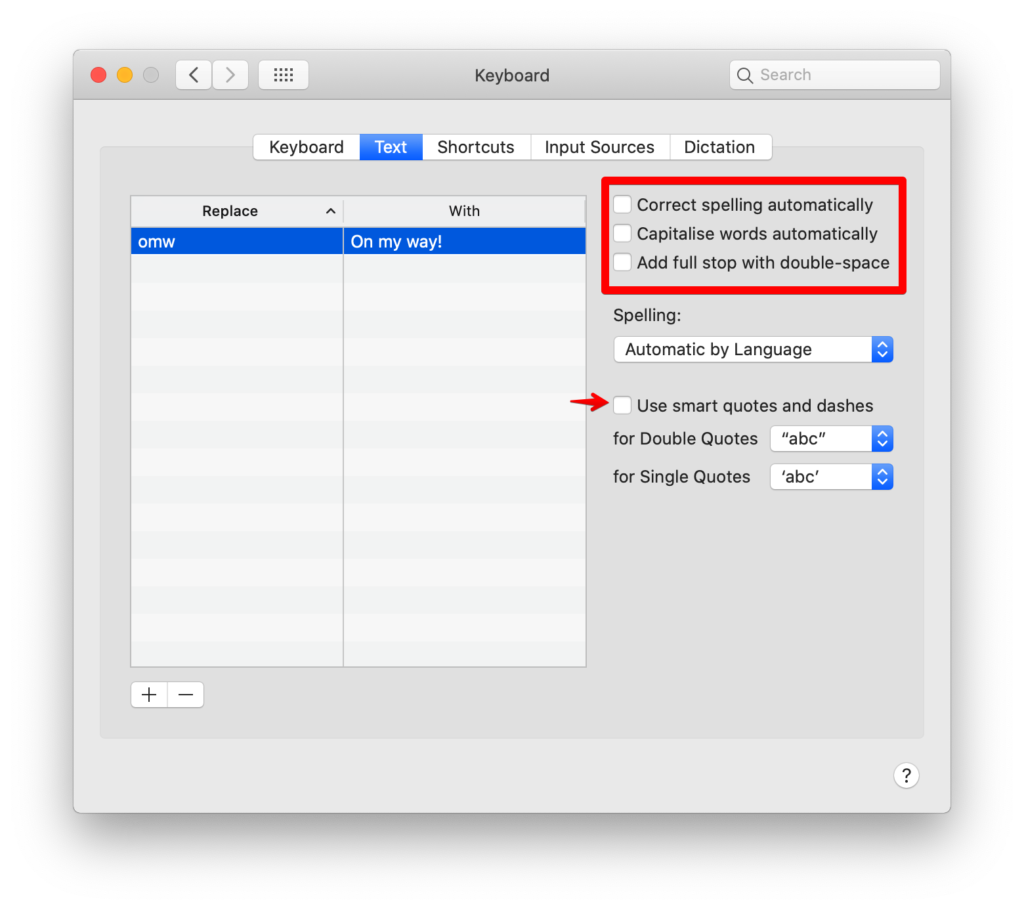
b. Go to the Text tab, uncheck all options, and also turn off “Smart quotes”. (For macOS Ventura, ->System Preferences->Keyboard->Text Input->Edit)
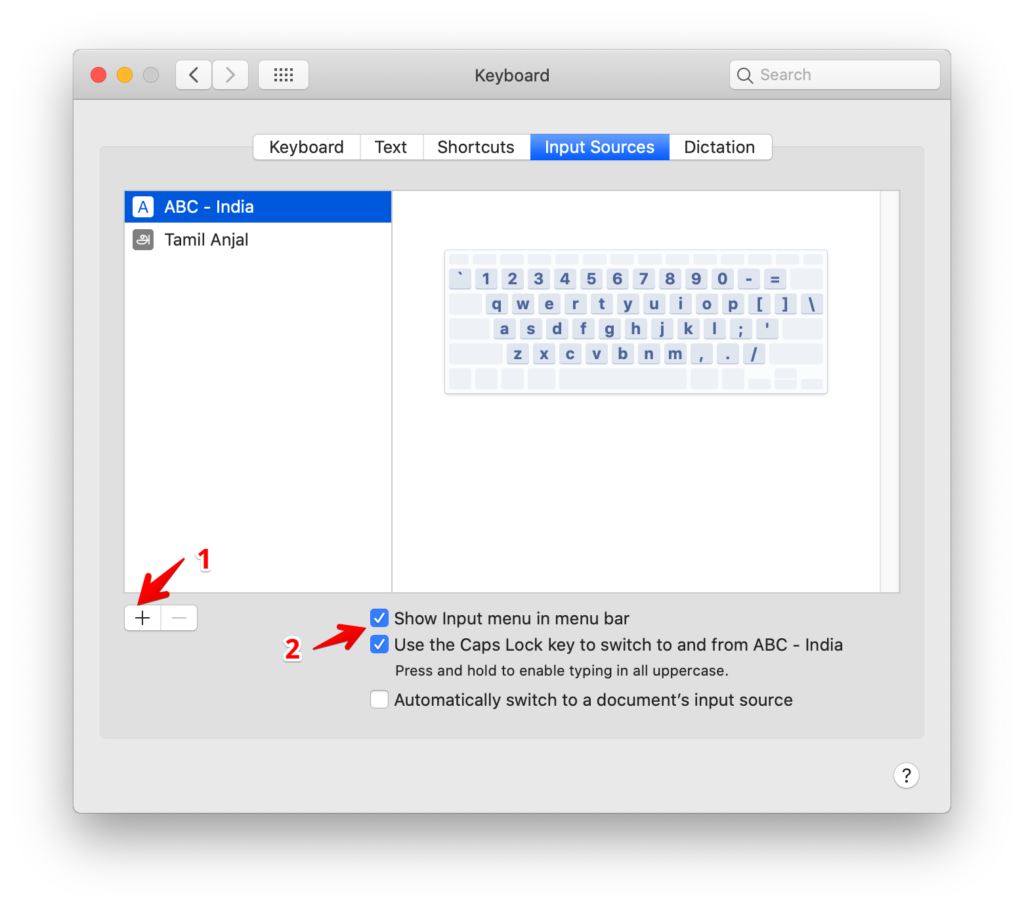
c. Go to Input Sources to add a secondary input language, I used to type Tamil as my second language on my Mac, so I am adding it here, also check “Show Input menu in menu bar” and “Use the Caps Lock key to switch to and from ABC – India”, so that you can use the seldom-used Caps Lock key for a practical function. (For macOS Ventura, ->System Preferences->Keyboard->Text Input->Edit->Press the + button in the bottom left.)
2. Finder Tweaks.
Go to Finder->Preferences or press ⌘+ from the Desktop to open the finder’s preferences.
- In the General tab, Unselect all options except “External disks”.
- In Sidebar Tab, I am not using any Tags & Locations, so I uncheck Tags & Locations and select all the other options.
- In the Advanced Tab, Unselect all the options except “Show all filename extensions”, and change “Search the Current Folder” when performing a search.
- Open a new Finder window, and then go to the View menu and click “Show Path bar” and “Show Status bar”.
- Finder->View, and choose “Show Path bar” and “Show Status bar.”
- Go to /Users/YOURUSERNAME and create a folder named “Developer”, it gives a nice hammer icon we can use for our web-related works, you can create a folder named “Sites”, but this icon won’t show up on “Favourites.”

3. Setting up Hot Corners
Go to ->System Preferences…->Desktop & Screen Saver->Screen Saver-> and click “Hot Corners…” I enabled Show Desktop when hovering in the bottom right corner(I love this feature from Windows), and show “Mission Control” when hovering in the bottom left corner. (For macOS Ventura, ->System Settings->Desktop & Dock.)
4. Setting up Dock
Open the terminal and paste this command, this will remove all the icons from the Dock so that we can add our only needed items.
defaults write com.apple.dock persistent-apps -array
killall Dock
If you want to add a smaller spacer, then run the below command.
defaults write com.apple.dock persistent-apps -array-add '{"tile-type"="small-spacer-tile";}'
killall Dock
If you prefer doing it via a small utility application, you can check Dockutil
Go to ->System Preferences…->Dock. Check “Minimise windows into application icon.” and uncheck “Show recent applications in Dock”. Adjust Size, Position, and Magnification according to your preference.
To add a “separator” (empty space) between icons to the dock for categorization, open up the Terminal app and enter this command.
defaults write com.apple.dock persistent-apps -array-add '{"tile-type"="spacer-tile";}'
killall Dock
Add as many as you want, and then you can click and drag the space.
1. Installing Homebrew, FTW.
Homebrew: The Missing Package Manager for macOS makes our lives a little easier. It allows you to install tools, utilities, and applications easily on your Mac. It saves us a lot of time.
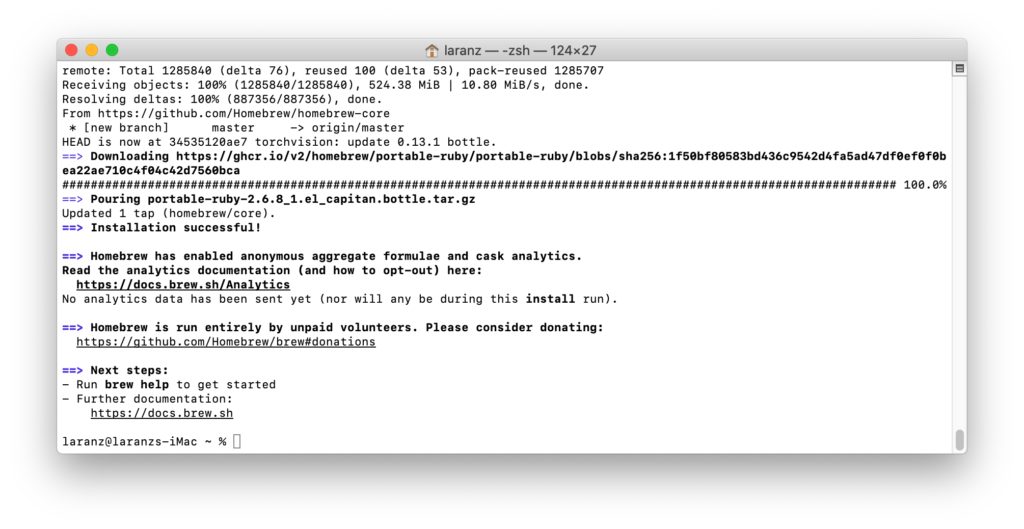
Open up the Terminal and enter this command, or visit the homebrew site for the latest command. Give a password when it asks.
/bin/bash -c "$(curl -fsSL https://raw.githubusercontent.com/Homebrew/install/HEAD/install.sh)"
It takes some time to download and install all the necessary things.
Now time to install all the needed casks(software) or the packages, copy and paste the command to your terminal, and alter it according to your needs.
- Homebrew Casks – https://formulae.brew.sh/cask/
- Homebrew Packages/Forumales list – https://formulae.brew.sh/formula/
brew tap nicoverbruggen/homebrew-cask
brew tap espanso/espanso

brew install --cask sensiblesidebuttons \
rectangle \
clipy \
appcleaner \
netnewswire \
iterm2 \
rocket \
alfred \
vlc \
mpv \
handbrake \
figma \
notion \
keka \
lulu \
microsoft-edge \
firefox \
google-chrome \
opera  \
orion \
sublime-text  \
visual-studio-code \
vscodium \
postman \
tableplus \
phpmon \
imageoptim \
hovrly \
alt-tab
brew install yt-dlp \
ffmpeg \
php \
node \
yarn \
gh \
mas \
espanso
Utilities
- Sensiblesidebuttons – Actually functional side navigation buttons on your third-party mice in macOS.
- Rectangle – Move and resize windows in macOS using keyboard shortcuts or snap areas.
- Clipy or FlyCut– Clipboard extension app for macOS. (Command+Shift+V, you can access your recent clipboard items.)
- AppCleaner – AppCleaner is a small application that allows you to thoroughly uninstall unwanted apps.
- NetNewsWire – NetNewsWire is a free and open-source RSS reader for Mac, iPhone, and iPad.
- iTerm2 – macOS Terminal replacement.
- Rocket – Rocket is a free Mac app that makes typing emoji faster and easier using Slack-style shortcuts.
- Raycast or Alfred – macOS Spotlight replacement.
- hovrly – A tiny and mostly invisible partner for distributed teams. Designed by those who know the value of time.
- mas – 📦 Mac App Store command line interface
- Alt+Tab – AltTab brings the power of Windows’s “alt-tab” window switcher to macOS.
- espanso – Discover the incredible power of a full-blown text expander.
Media
- VLC or mpv– a free and open-source cross-platform multimedia player.
- yt-dlp – Command-line program to download videos from YouTube.com and other video sites.
- ffmpeg – a CLI tool designed for processing video and audio files. (helpful for yt-dlp downloads.)
- handbrake – The open source video transcoder
- imageoptim – file resizing and optimizing images by removing bloated metadata. Saves disk space & bandwidth by compressing images without losing quality.
Apps
- Figma – A Collaborative Interface Design Tool
- Notion – for productivity and note-taking.
- Keka – the macOS file archiver.
- Lulu – LuLu is the free, open-source firewall that aims to block unknown outgoing connections, protecting your privacy and your Mac!
- phpmon – Lightweight, native Mac menu bar app that helps you manage multiple PHP installations
- Tableplus – Database management made easy.
- Postman – For testing REST APIs.
You can also make use of Brew Bundle command, where you can import your old installed software programs and packages to your new system.
For updating Homebrew, add these aliases in the ~./zshrc
alias brewup='brew update; brew upgrade; brew cleanup;'
alias bup='brew upgrade --cask --greedy'
2. Setting up “iTerm2.”
As web developers, we spend a lot of time on the terminal, so making it pretty is a good thing. If you’re not a terminal guy, you can skip it, but I recommend it. Learn it, and it will save a lot of time for you.
I am using ZSH as my Shell since Catalina Mac ships with ZSH by default, so we don’t need any extra steps. If you’re from the old version of macOS, try these steps.
- Install Oh My Zsh, it is a framework for managing your Zsh configuration including themes and plugins to improve our terminal experience. Copy and paste the below command into your terminal.
sh -c "$(curl -fsSL https://raw.githubusercontent.com/robbyrussell/oh-my-zsh/master/tools/install.sh)"
It comes with the default git plugin, we can Install a few of the Oh My Zsh plugins according to our requirements.
git clone https://github.com/zsh-users/zsh-syntax-highlighting.git ${ZSH_CUSTOM:-~/.oh-my-zsh/custom}/plugins/zsh-syntax-highlighting

git clone https://github.com/zsh-users/zsh-autosuggestions $ZSH_CUSTOM/plugins/zsh-autosuggestions
After installing the plugins, open the ~/.zshrc file, here I use sublime to edit the file, you can use your preferred text editor.
subl ~/.zshrc
Around line #73 add all the installed plugins’ names, I also added a few bundled plugins.
plugins=(git brew zsh-syntax-highlighting zsh-autosuggestions copypath dirhistory gulp yarn wp-cli copyfile)
after hitting save, go back to the terminal and write this command or you can close the iTerm2 and open it again to make the changes apply.
source ~/.zshrc
- Remove the “Last Login” message from the terminal, and type this command on the newly opened iTerm.
touch ~/.hushlogin
- For themes, I prefer to use a custom prompt engine, here I installed Oh My Posh.
brew install jandedobbeleer/oh-my-posh/oh-my-posh
After installing add this command to the last line of ~/.zshrc, so the prompt engine will start running when opening the terminal.
eval "$(oh-my-posh init zsh --config /Users/laranz/.config/bubblesextra.omp.json)"
I am using the theme bubblesextra, so I copied that theme to my .config folder for later customization and gave its path. This is my customized theme.
Oh my posh needs a nerd font for most of their themes. I am using JetBrains as my default terminal font, so I am installing the JetBrains Nerd font. You can manually install them here at https://www.nerdfonts.com/font-downloads, or you can install them via Homebrew. After that, edit iTerm Preference->Profiles->Default->Text->Font and choose the installed font
brew tap homebrew/cask-fonts
brew install --cask font-jetbrains-mono-nerd-font
Little Tweaks.
- Open iTerm -> Preferences -> General -> Closing, uncheck all options.
- Open iTerm -> Preferences -> Appearance -> General -> Theme to Minimal.
- Open iTerm -> Preferences -> Profiles -> Default -> Colors, I prefer the “Nord” colour scheme, you can download it from here https://iterm2colorschemes.com/, save the file and then in the Color Presets click Import and then choose Nord.
- Open iTerm -> Preferences -> Profiles -> Default -> Text, change the Cursor to Underline, check “Blinking cursor”, and then increase the font size if you’re using a big monitor. Change the font to “JetBrainsMono Nerd Font”
- Open iTerm -> Preferences -> Profiles -> Default -> Window, choose Transparency 6% and blur of 12%.
- Open iTerm -> Preferences -> Profiles -> Default -> General -> Badge and add a custom text. I entered wptitans.
- Open iTerm -> Preferences -> Keys -> Hotkey-> check “Show/hide all windows with a system-wide hotkey” and choose the “~” Tilde key as a hotkey. It presents below the escape, it is mostly not useful, so we can make use of it.
colorls
A Ruby gem that beautifies the terminal’s ls command, with color and font-awesome icons. 🎉
brew install ruby
gem install colorls
Please enable the Nerd Font at iTerm2 -> Preferences -> Profiles -> Text -> Non-ASCII font, choose a Nerd font, and adjust the size according to your needs, which will reflect on the icons.
Open ~/.zshrc, and add these alias.
alias ls='colorls --sort-dirs'
alias lc='colorls -lA'
alias tree='colorls --tree=1'
You can read more about the configurations and usage here: https://github.com/athityakumar/colorls
3. Setting up for PHP/WordPress Development.
- Installing WP-CLI.
brew install wp-cli
- Install Composer.
brew install composer
After installing the composer, make sure you add its executables to the path.
echo 'export PATH="$PATH:$HOME/.composer/vendor/bin"' >> ~/.zshrc
- Install Valet. Valet is a blazing-fast Laravel development environment. In the background it uses Nginx and DnsMasq to lift all the heavyweight for us, not only for Laravel, we can use the same for any PHP-based development, I mainly develop for WordPress.
brew update

brew install php #we already did that in the previous step, you may skip.

composer global require laravel/valet

valet install #it will automatically install nginx, phpfpm and dnsmasq and configured it.

valet use php

valet restart
After installing the valet, create a new directory for all our development sites, I create a folder in root named “Developer” and park the valet there.
take ~/Developer
valet park
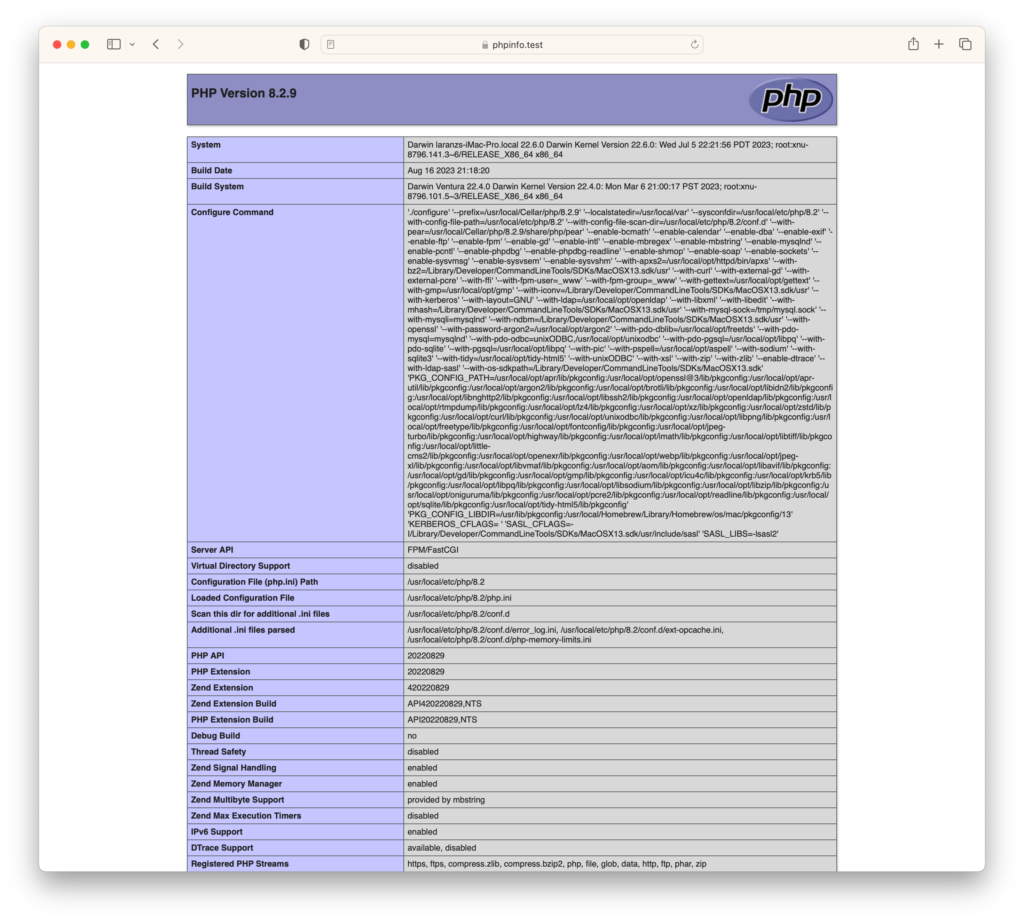
take phpinfo
valet secure phpinfo #to make our localhost https.
echo '<?php echo phpinfo();' >> index.php
now open, https://phpinfo.test/
- Installing MariaDB Server, for all our Database works.
brew install mariadb
Then, after it finishes installing, restart the service.
brew services start mariadb
After that, we need to set the password for the MySQL root user first. To do so, enter the commands in the terminal one by one.
sudo mysql -u root
SET PASSWORD FOR 'root'@localhost = PASSWORD("root"); //root is the my chosen password.
exit
- Install Xdebug, if you’re into PHP Debugging.
pecl install xdebug
After installing restart the valet and visit our phpinfo.test to confirm that it’s installed successfully, also you can run php -v on the command line for the confirmation.
- Configure and authenticate GitHub by running this command.
gh auth login
- Setting up PHP_CodeSniffer & Auto Formatter for PHP/WordPress Development. Follow these tutorials. For VSCode https://wptitans.com/setting-up-php_codesniffer-auto-formatter-for-wordpress-development-in-visual-studio-code/ For PHPStorm https://wptitans.com/setting-up-php_codesniffer-auto-formatter-for-wordpress-development-in-phpstorm/
4. Running up a WordPress instance in a jiffy.
Fire up your Terminal, and type the following command.
cd Developer
take learn
valet secure learn
the ‘take’ command will create a new folder and move the terminal into it.
wp core download
With the help of wp-cli, we download WordPress’s latest version into our ‘learn’ folder, we save the hassle of downloading it from the website by visiting it, unzipping it, and copying it to our desired folder.
Now open the MySQL command line utility for creating a database. Run the below command.
mysql
After that,
create database learn;
Now, open https://learn.test/, it will take you to the famous WordPress 5-minute installation page, and enter all the necessary details.
- Database Name – learn
- Username – root
- Password – root
- Database Host – localhost
- Table Prefix – wp_ (you can change if you prefer.)
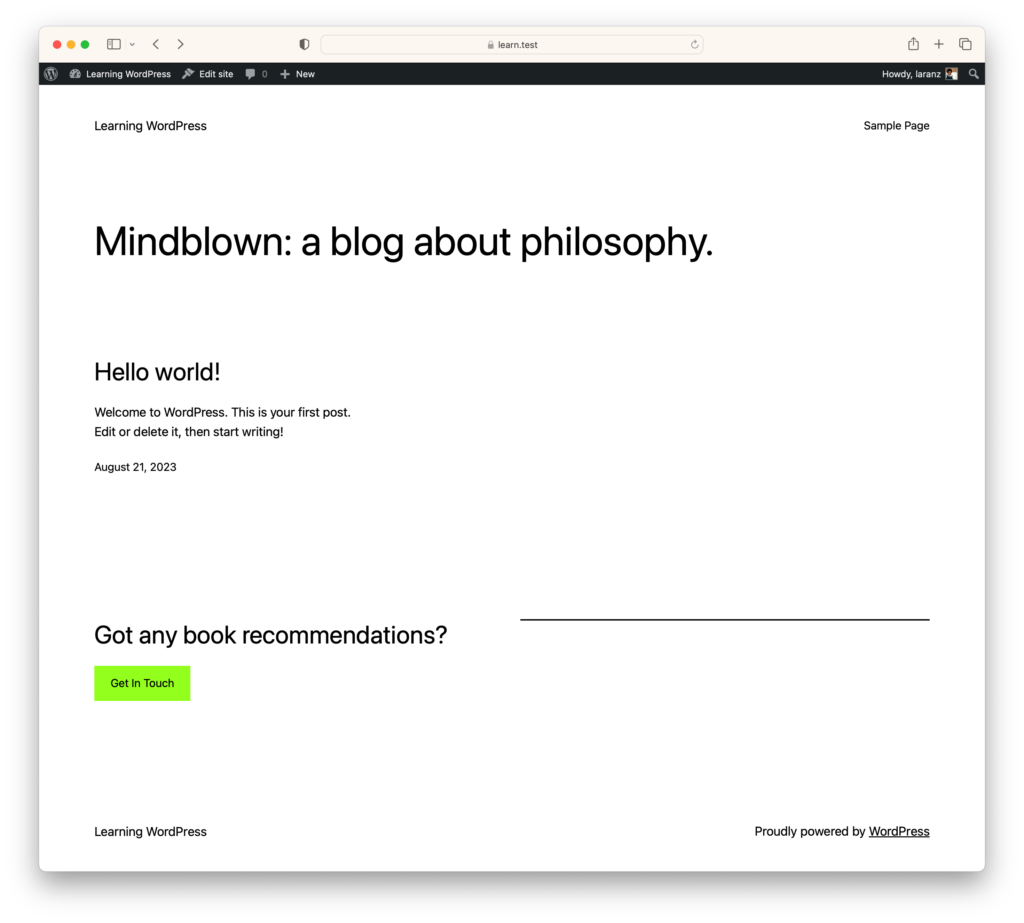
This is just the tip of the iceberg, you can customize it further according to your taste.
(END)